Write a Book, Blog or Report

In Notewrap, you can take notes whenever imagination strikes, later add these notes to a notebook and write a book, blog or essay. After you add them, you can convert these notes into scenes and then arrange and combine them into chapters and create a book, blog or essay as shown below.

Add Notes
Each Chapter on New Page
Scenes into Chapters
PDF

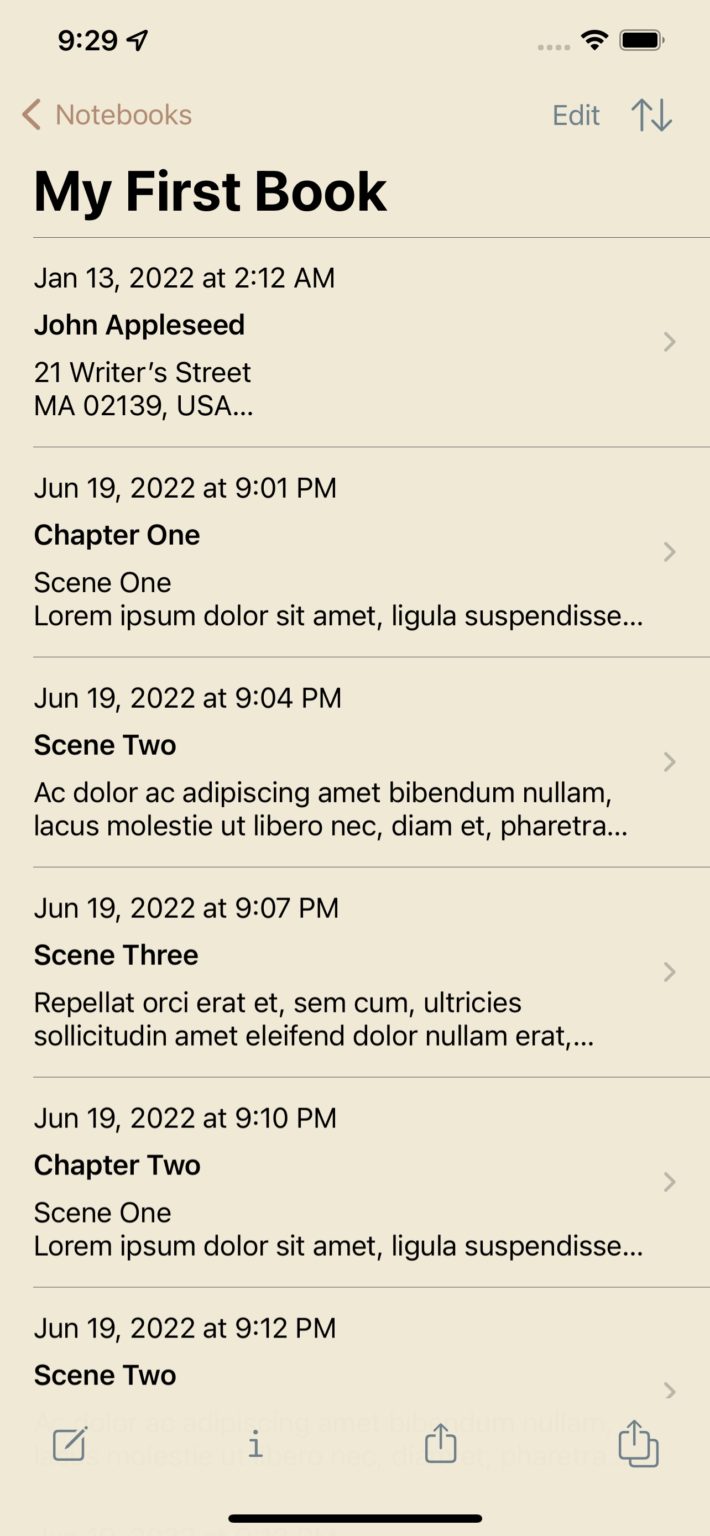
– Add notes to a notebook, convert them into scenes that would belong to a chapter and arrange the scenes in the order you want them to appear in the chapters (How to add to & arrange notes in a notebook?).   

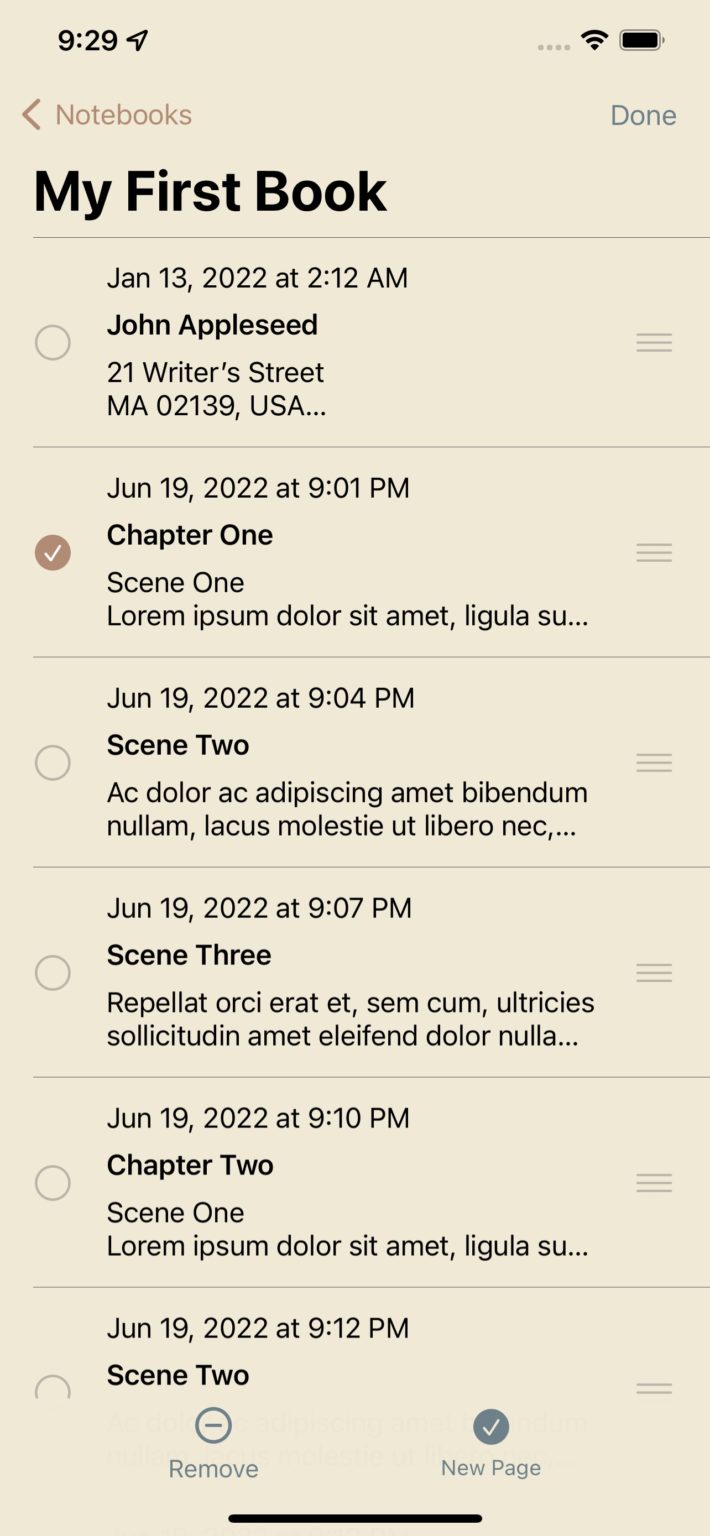
– Each chapter has to begin on a new page, to do that tap edit button on the top right of the screen, then select the first scene of the chapter and then set New Page on by tapping the New Page button as shown in screenshot 2 above. 

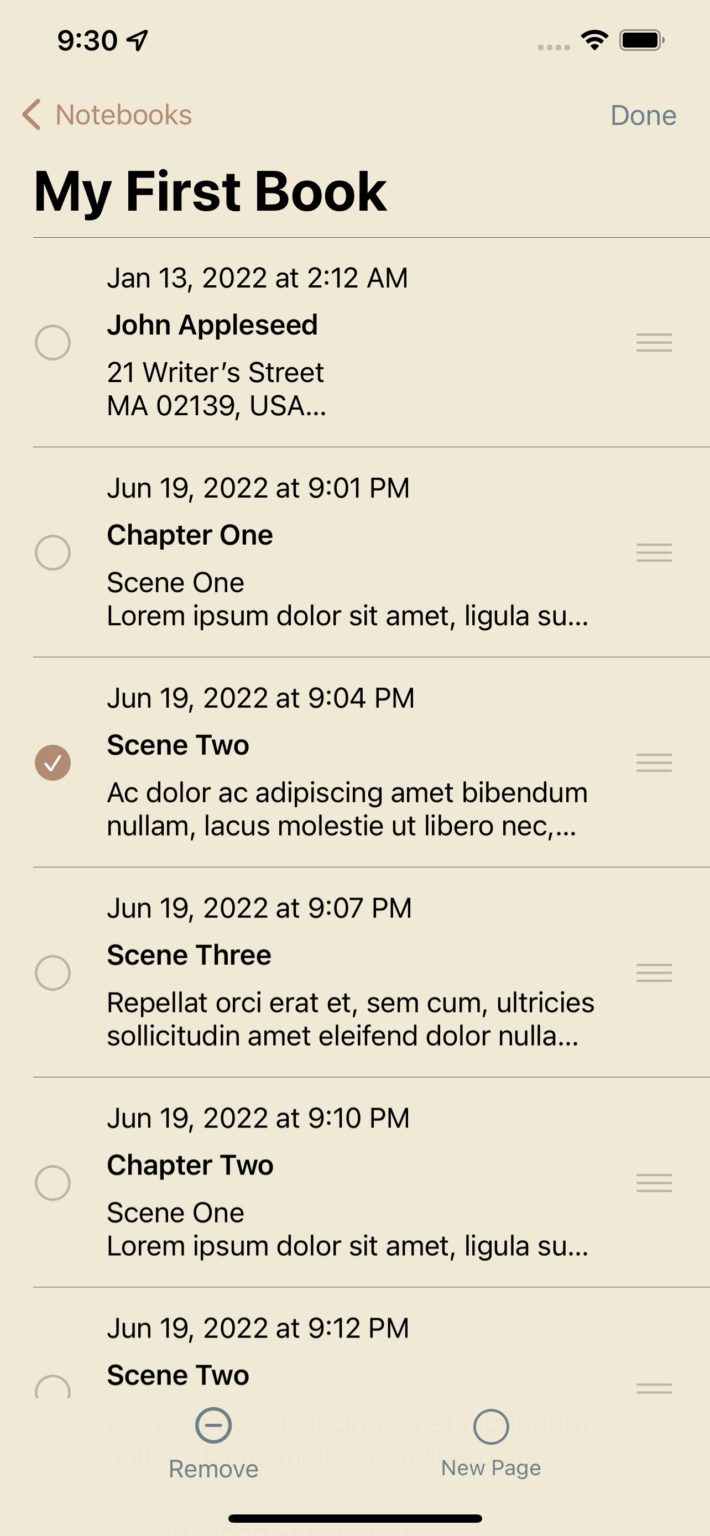
– To combine scenes into chapters, you will have to make sure that they are published & printed continuously and that each scene doesn’t begin on a new page, to do that tap the second scene of chapter one and then set New Page off by tapping the New Page button as shown in screenshot 3 above. Repeat this for remaining scenes in the chapter.  

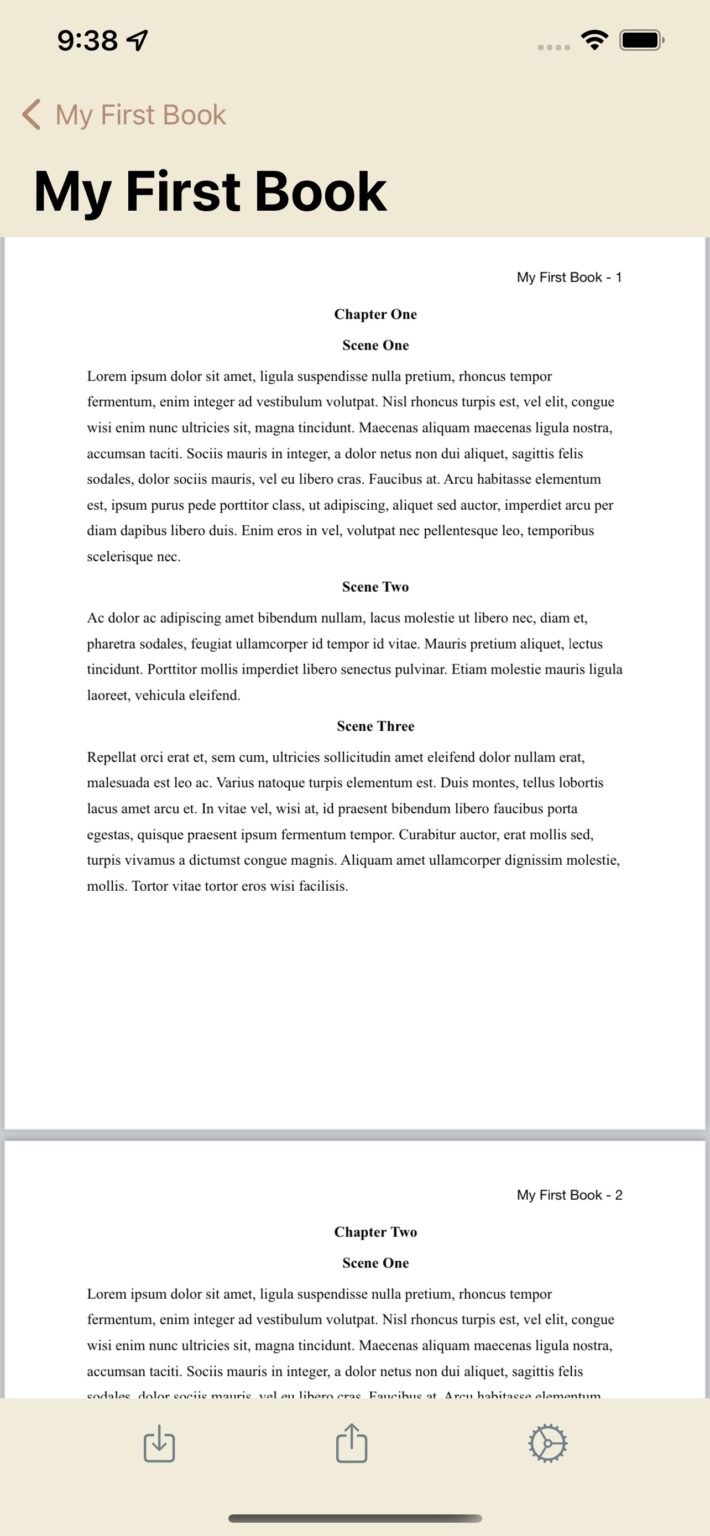
– That’s it, your book, blog or essay is ready to be published & printed, Notewrap will use the settings to create a beautiful pdf for you where it will automatically wrap the scenes into chapters and start each new chapter on a new page. You can also add front and back matter to your book, blog or essay as shown in the screenshots above. Notewrap also lets you export your notes, photos & notebooks into various file formats such as plain text, html, markdown, rtf, pdf etc.

Continue ReadingWrite a Book, Blog or Report

How to Install and Configure WordPress JWT Auth Plugin?

JWT Auth Plugin lets WordPress authenticate users from mobile apps.
Install the JWT Auth Plugin and activate it from your dashboard.

To configure the JWT Auth Plugin follow the steps below:
1) Edit the .htaccess file and add the following lines to it.
RewriteEngine on
RewriteCond %{HTTP:Authorization} ^(.*)
RewriteRule ^(.*) – [E=HTTP_AUTHORIZATION:%1]
You have to use the File Manager of WordPress to edit the .htaccess file.
If you are using the services of a website hosting provider e.g. Dream Host, then they have their own file manager to manage WordPress files, you can use their file manager to locate and edit .htaccess file.
Open the file Manager and it will list all your WordPress files. You should see a few folders, open the folder with name of your site, eg. (example.com).
You will see the .htaccess file in this folder e.g. (example.com). Open and edit the .htaccess file and add the above lines to it.
If you notice that “RewriteEngine On” line already exists then insert the lines below it, just below RewriteEngine On, it’s important that we follow the sequence.
Most of the shared hosting have disabled the HTTP Authorization Header by default and this enables it.
If you need any help on how to locate and use the File Manager, do get in touch with support team of your WordPress hosting provider.

2) Continue to edit the .htaccess file and add the follow line to it.
SetEnvIf Authorization “(.*)” HTTP_AUTHORIZATION=$1
Just add it below the 3 lines that you added in Step 1
This enables the WPENGINE.

After completion of Step 1 and 2 your .htaccess file should look somewhat like as shown below.
# BEGIN WordPress
# The directives (lines) between “BEGIN WordPress” and “END WordPress” are
# dynamically generated, and should only be modified via WordPress filters.
# Any changes to the directives between these markers will be overwritten.

RewriteEngine On
RewriteCond %{HTTP:Authorization} ^(.*)
RewriteRule ^(.*) – [E=HTTP_AUTHORIZATION:%1]
SetEnvIf Authorization “(.*)” HTTP_AUTHORIZATION=$1
RewriteBase /
RewriteRule ^index\.php$ – [L]
RewriteCond %{REQUEST_FILENAME} !-f
RewriteCond %{REQUEST_FILENAME} !-d
RewriteRule . /index.php [L]

# END WordPress

3) Edit the wp-config.php file and add Secret Key that is used to authenticate.
To add the secret key edit the wp-config.php file and add the following line.
define(‘JWT_AUTH_SECRET_KEY’, ‘your-top-secret-key’);

You can replace the string “your-top-secret-key” with a key from here -> https://api.wordpress.org/secret-key/1.1/salt/
After you edit the above files and add the above lines do save the file.
The wp-config.php file is in the same example.com folder where .htaccess file is.

After you have configured the JWT Auth Plugin as mentioned above and saved the files, you can sign in to WordPress with your credentials from Notewrap.

Continue ReadingHow to Install and Configure WordPress JWT Auth Plugin?

Publish Posts to WordPress

Publish posts to your self hosted WordPress(.org) site right from Notewrap. Before you SignIn from Notewrap to WordPress, you’ve to download and install JWT Auth Plugin. Follow the instructions in the description of this plugin to configure the plugin.  A detail description is here -> How to Install and Configure WordPress JWT Auth Plugin? 

JWT Auth is an industry standard  RFC7519 authentication method recommended by WordPress to authenticate WordPress users via a mobile App.

Once you have installed and configured properly the JWT Auth Plugin, you can SignIn with your WordPress username, password and site details to your self hosted WordPress site and start posting notes as blogs directly from Notewrap app.

Continue ReadingPublish Posts to WordPress